HyperSpin
Contents
How to Configure HyperSpin in Five Easy Steps
This is a step by step guide of how to use RocketLauncher on HyperSpin.
Step 1: Install HyperSpin
- You will have the least amount of issues installing HyperSpin and RocketLauncher into their own unique folders on the root of your drive.
- For the remainder of the guide, we will use the H: drive as the example.
- Go to http://www.hyperspin-fe.com/ and install the latest version of HyperSpin
- Install it to H:\HyperSpin
Step 2: Install RocketLauncher
- Follow the instructions on RocketLauncher_Clean_Install
- Install it to H:\RocketLauncher
DO NOT INSTALL ROCKETLAUNCHER ON THE SAME FOLDER AS HYPERSPIN. THIS WILL POTENTIALLY CAUSE UNFORESEEN ISSUES.
Step 3: Configure HyperSpin
HyperSpin version 1.4 or higher
- Open your HyperSpin\Settings\Settings.ini file and set the path were you installed RocketLauncher.
[Main]
Hyperlaunch_Path=H:\RocketLauncher\RocketLauncher.exe
- Open your HyperHq (located on the same folder that your HyperSpin install), go to the wheel settings tab and for every system that you want to use RocketLauncher to launch your games make sure that the execution option is set to "HyperLaunch".
HyperSpin version 1.3 or lower
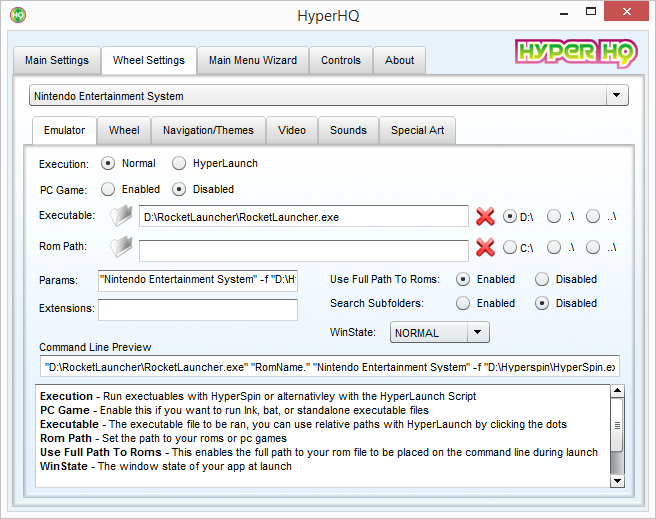
- Open your HyperHq (located on the same folder that your HyperSpin install), go to the wheel settings tab and for every system that you want to use RocketLauncher to launch your games make sure that:
- The execution option is set to normal;
- The PC Games option is disabled;
- The executable path is set to your RocketLauncher.exe path;
- The parameters field contain something like this: "Nintendo Entertainment System" -f "D:\HyperSpin\HyperSpin.exe" -p "HyperSpin"
- The extensions field is empty;
- The use full path to roms is enabled.
Step 4: Configure RocketLauncher
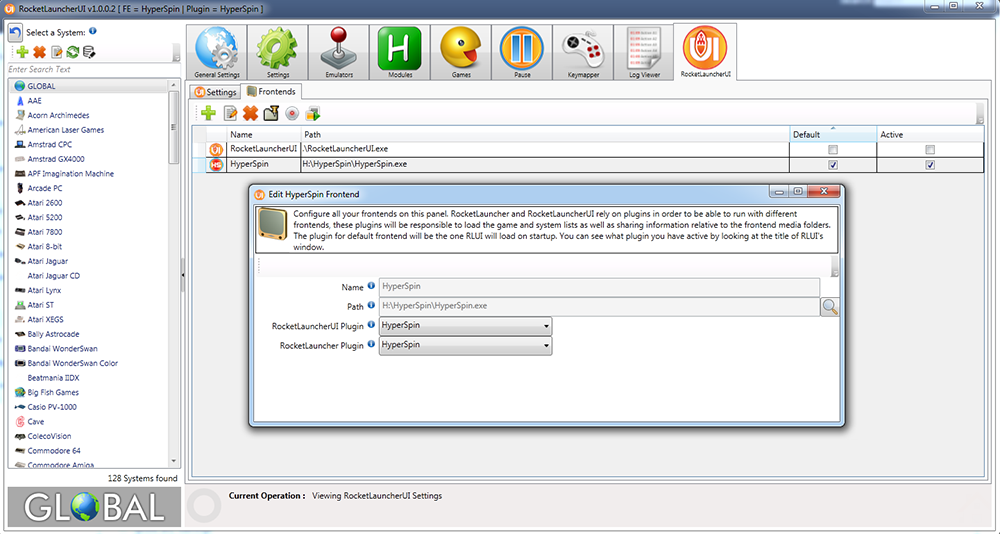
- Open the RocketLauncherUI.exe located on the RockeLauncher\RocketLauncherUI folder.
- Allow RocketLauncherUI to update your files to the most up to date version.
- Choose the RocketLauncherUI tab, and the Frontends sub tab.
- Click on the plus sign and complete the fields to configure HyperSpin as your Frontend.
- Make sure you click the save button to add the HyperSpin Frontend, and select HyperSpin as your Default and Active frontend.
Step 5: What else?
- Nothing more. Every system configured on RocketLauncher will launch perfectly on HyperSpin.
- If you want to test other FrontEnds, just add them to the RocketLauncherUI frontends tab set the frontend to use the RocketLauncher.exe as their "emulators".
If you have problems read carefully the RocketLauncher_Troubleshooting If you still have problems create a thread on the RocketLauncher forums, write the HyperSpin version that you are using together with screenshots of the error and a RocketLauncher troubleshooting log.

