RLUI GUI Explanation
Even though the RLUI GUI usage should be straight forward, this section intends to give a quick overview of it and all it's major features.
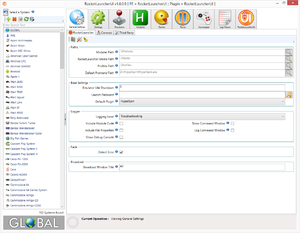
This is what you see when you start the application:
At the left side you will see a list (from now on referred as system list) of all your installed systems with a small icon alongside each of them, if you are missing an icon then that system is either not named using the official name or it's not officially supported.
At the bottom of the system list you will also see the wheel for that system, this is grabbed from Media\Logos inside your RocketLauncher folder.
At the left it's where all the action happens, this is where you will be able to configure every single aspect of RocketLauncher, most of these settings are in context with the selected system on your system list, but this will be detailed further ahead once we go into the detail of each tab. If you select GLOBAL at your system list you will be working at the global level and any options you set there will be used for every single system unless you define different options on a specific system.
Below that panel you have a progress bar with some info that gets updated on some longer events like module scanning:
In case of a problem that RLUI cannot solve and requires your manual intervention, a Warning sign will be displayed at the right bottom corner, move the mouse over it and you'll see a tooltip describing the problem and the actions you must perform to fix it. This is something that will only happen if you start editing ini files manually, if you always use RLUI to make your configurations you should never see that warning sign. This is the sign that you will see:
At the very top you can see several large tab items, these break down the main RocketLauncher features. Each of these tabs have more internal tabs that group the different settings together according to their functionalities.
There are some General Buttons used across the whole application that you should be comfortable with:
| System Quick Navigation Button - This will allow you to easily jump from GLOBAL to the previous system you have been working on, so if for example you are working on a certain system and need to go back and forth to GLOBAL to check some settings, instead of clicking in the system list every single time you can simply press this button to quickly move from that system back to GLOBAL. | |
| Reset to Default Values - You'll see this button on most of the internal tabs and by clicking it you will be resetting all the settings of that specific panel back to their default values. When under the context of a certain system this usually means setting all the values back to use_global. | |
| Copy Values From GLOBAL - When under the context of a system, this button will allow you to copy all the GLOBAL settings of that panel into the current system. | |
| Save Profile - This button will let you save a profile with all the current options you are using so that you can load it back later on. There are different types of profiles you can save : Fade Profiles, MultiGame Profiles, RomMapping Profiles, Pause Main Profiles and Pause Appearance Profiles. You save each of them under the appropriate tab. You can also use this to save your working settings before doing some testing so you can revert back to your original values. | |
| Load Profile - Loads the profiles created with the Save Profile button. For each Save Profile button there will be a Load Profile button together with it that will load that same type of profile. | |
| File/Folder Browse - This will allow you to browse for a file or folder depending on the setting you are editing. | |
| Hotkey Editor - Opens the Hotkey editor and will allow you to set any Hotkey in RocketLauncher's xHotkey format using a dedicated GUI for the process. | |
| Text Options Editor - Opens the Text Options editor, that will allow you to configure several text options (like font size, color, alignment, etc.) for some specific settings. | |
| Option List Editor - Opens the List editor which allows you to configure options list for some specific settings. |
Help Tips
Every setting has an associated help description, that you can read to see exactly what that setting does. Just hover the mouse to the little blue info icon at the right of that setting name and a tooltip will appear with the help description.
Data Validation
You can't enter any data you want into the several fields, RLUI has a built-in data validation system that will prevent you from adding invalid information, such as adding text on settings that only accept numbers. It will alert you for example when you setup a path that doesn't exist. Every time there is an error on a certain setting that field will be highlighted in red.
By moving your mouse over the problematic field you will see an error message stating what is wrong. In the example above it is stating that particular file cannot be found so you should address it. Anytime time you see a validation error make sure you correct it or it might cause RocketLauncher to not work properly. Validators will also be applied to several tables as it will be seen with detail further ahead.
Now that the basics are covered you can move on to the RLUI Features section where you can go into detail on each feature.


